BIOS to boot from the CD/DVD-ROM
 Click to return to "How to Use Tunepass Windows Password Recovery Standard"
Click to return to "How to Use Tunepass Windows Password Recovery Professional"
Click to return to "How to Use Tunepass Windows Password Recovery Ultimate"
Click to return to "How to Use Tunepass Windows Password Recovery Standard"
Click to return to "How to Use Tunepass Windows Password Recovery Professional"
Click to return to "How to Use Tunepass Windows Password Recovery Ultimate"
Generic procedures are as follows:
Start with your computer turned off.
Turn on the computer. As it starts, it should display an option to enter the system setup menu, or BIOS, commonly reached by keys like DELETE, F1, F2, F10, F12 or Alt+S. Use whichever keystroke indicated on screen. In some cases your computer may display a graphic while it starts. Typically, pressing Esc will dismiss the graphic and allow you to see the necessary messages.
Find the setting that controls which device the system boots from. This is usually labeled as the "Boot Order" and commonly shown as a list of devices, such as Floppy, CD-ROM, First Hard Disk, and so on.
Make sure that CD-ROM is selected as a first priority boot device. Make the change, then save and exit. (In case of doubt, you should consult the manual that comes with your computer, and/or its motherboard.) The computer should now restart.
Some computers have an option to boot once from CD-ROM/HDD/Floppy/USB device. Keep tapping the F8 button at boot time and then choose to boot from CD-ROM when boot menu comes up.
The rest of this section contains detailed description of this procedure for different motherboard and BIOS vendors
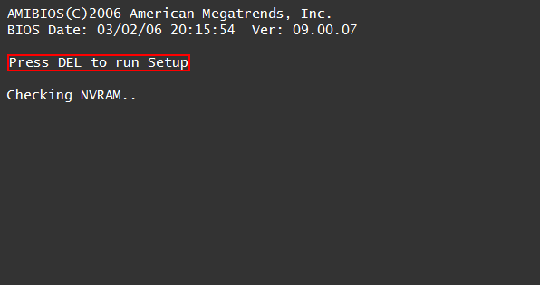
1. Setting up AMI BIOS
AMI BIOS usually requires you to press DEL key to enter setup
Choose the BOOT menu and set Boot Device Priority option: set first boot device to CDROM and second boot device to HARD DRIVE. Now you can press F10 to save settings.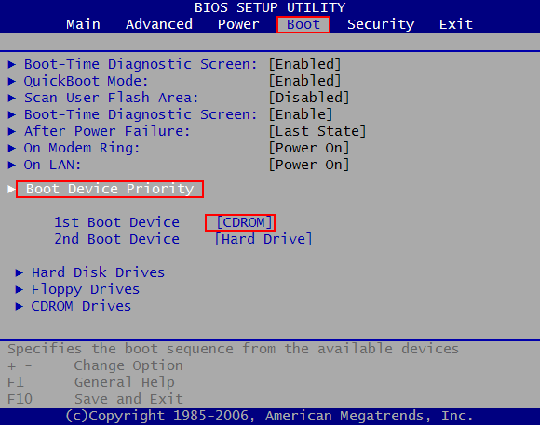
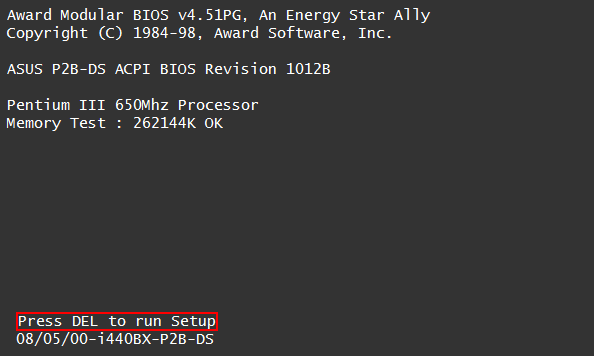
2. Setting up Award BIOS
On Award Bios you will see something like this screen. Press a key required to enter BIOS setup:
Now choose Advanced Bios Features
and set First Boot Device to CDROM and Second or third to HDD-0 and Press F10 to save it.
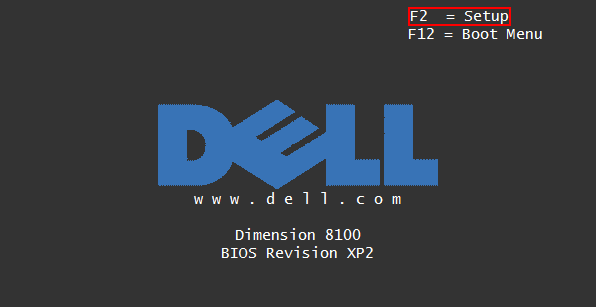
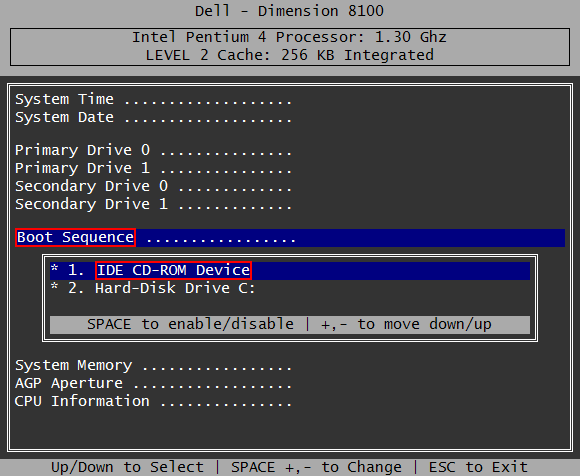
3. Setting up Dell BIOS
On some Dell Systems you can enter BIOS by pressing F2
Now choose Boot Sequence and then assign CD-ROM to first position by pressing – and + and press space to enable it (when enabled, it is marked by asterisk *). Press ESC and choose "save settings and exit".
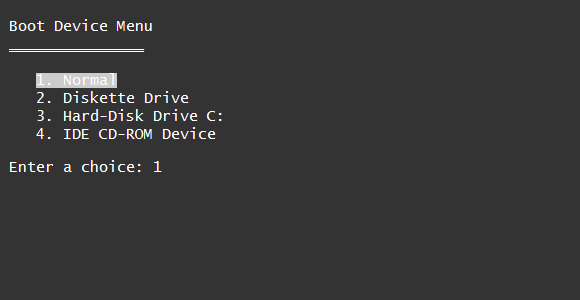
On some Dell Systems you can press F12 to boot from CD sometimes.
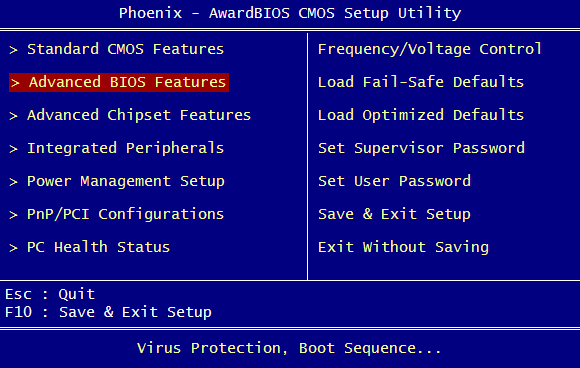
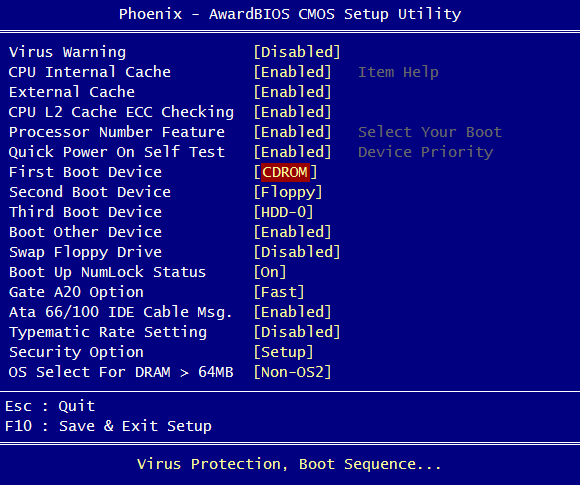
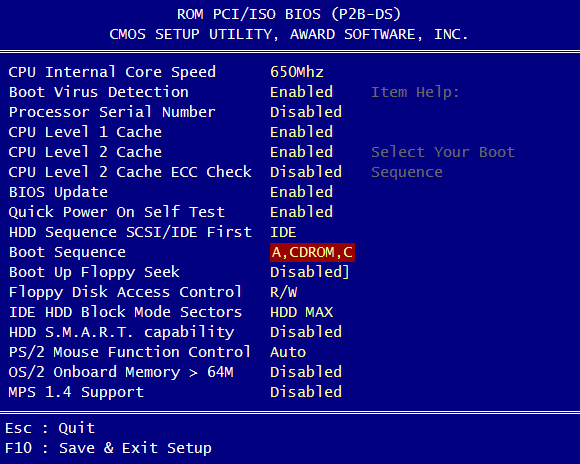
4. Setting up Phoenix BIOS
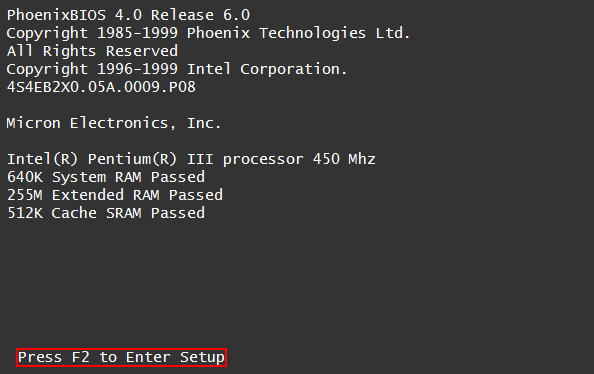
Press F2 to enter BIOS setup:
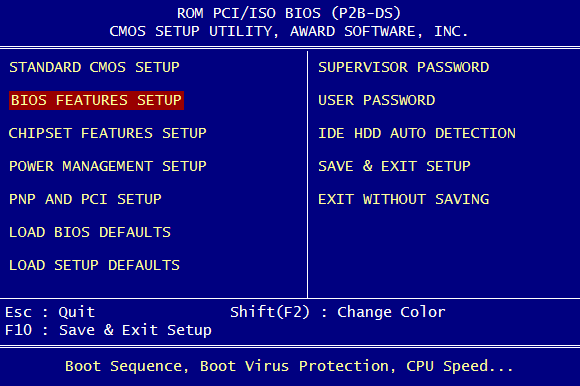
and set Boot Sequence to A,CDROM,C. Then press Esc and F10 to save it.
Click to return to "How to Use Tunepass Windows Password Recovery Standard"
Click to return to "How to Use Tunepass Windows Password Recovery Professional"
Click to return to "How to Use Tunepass Windows Password Recovery Ultimate"